|
|
|
|
Walkthrough for Stainfinder - 3
|
Using Stainfinder with TreeView
If you have correctly configured your web server and
Stainfinder, and if you have a clustered data sets prepared, then you
are ready to start using Stainfinder with TreeView.
- Open the TreeView program and load your clustered dataset.
If you have not already done so, proceed to the walkthrough for generating a
clustered dataset of your TMA data. Alternatively, you may download
the demo clustered datasets from the Downloads section and use that
instead.
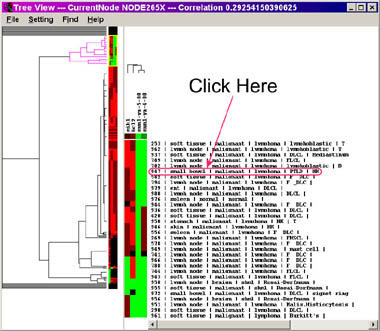
- You may now click on one of the descriptors (shown below) to view
the corresponding spot images from your collection.

Click here for a larger
view
- A new browser window will open, and you should get a
screen like the one shown below (depending on how many antibodies
stains you have available on your digital image collection for that particular core):

Click here for a larger
view
Here, the default settings will be selected. The thumbnail
images will be shown in the same browser window, and you can select a
percentage value of the original image size for those thumbnails. You
should also select the correct maximum resolution for your
monitor, since Stainfinder will size the browser window of zoomed
images (more on this in the next step). You will notice that
Stainfinder will provide a list of all available antibodies for that
particular core sample, with the relevant antibodies preselected,
based on your data set being viewed in TreeView. You may alter your
selections as desired. In addition, if you wish to retain your
altered selections, choose your appropriate options, and a cookie will be set
on your computer.
- Click on "Display checked images". You should get a
screen like the one shown below (depending on your selection of
antibodies):

Click here for a larger
view
You will notice that the images retrieved correspond to
either the antibodies present in your datasets, or your own
selections. This is a helpful feature for comparing the scores shown
in your dataset under TreeView with the actual stain images.
Note: you may have to scroll down to see your images.
In addition, if an antibody appears more than once in your data set
(as shown earlier in this TreeView example), it will be displayed only
once with Stainfinder.
- You may now click on the link corresponding to one of
the images. This will bring up the browser window containing the
full-size image, allowing you to browse the image in full detail:

Click here for a larger
view
You are now ready to use Stainfinder with TreeView to
verify scores, compare stains, or perform any other function that would
assist you in exploration of your digital image collection and
corresponding data analysis.
You may also explore an on-line version by clicking here.
back to top
Back to Step 2.
Return to the walkthrough overview.
|
|

