|
What you will need for this walkthrough:
Note: if this is your first time using this TMA data
management system, it is recommended that you proceed to the Downloads
section and download the Demo Suite files. The examples presented in
this walkthrough employ those files, and you should obtain the same
results in using these files and with the
other necessary programs available elsewhere.
- Raw scoring worksheets containing your TMA data
- A lookup file containing information about each case
- The TMA-Deconvoluter
- The Cluster program
- The TreeView program
- Microsoft Excel for Windows with Visual Basic support installed
- A Windows PC
Begin by storing a copy of the TMA-Deconvoluter, your raw
scoring worksheets, and the lookup file in the same folder. (If you
decide to put the files elsewhere, you will need to know how to
specify the appropriate path information in the entry fields for those
files).
Note that Office XP, 2003, and later usually defaults the security level
to "high". In that situation, you may get this dialog box:

To fix this, go to the Tools menu, select Macros, and then select Security, as shown below.
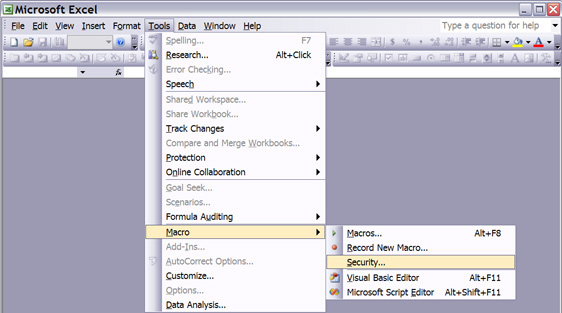
You will get this dialog box:
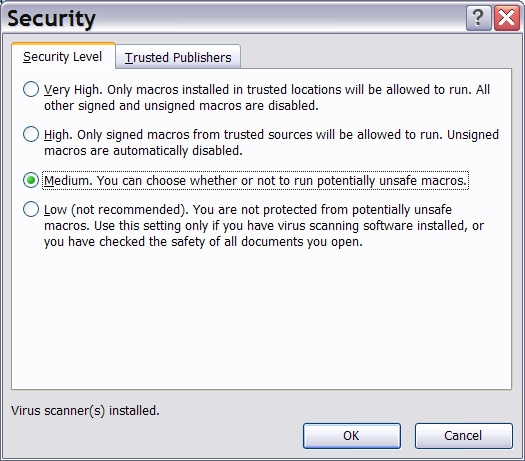
Please ensure that "Medium" is selected. If you have "High" or "Very High"
selected, the TMA-Deconvoluter will not run. Once you've clicked "OK", you may
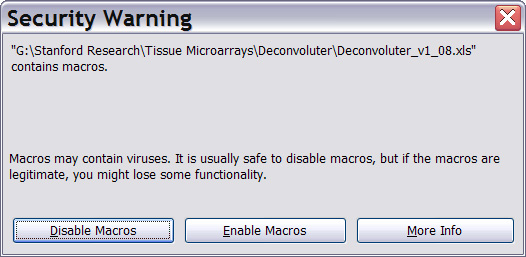
now open the TMA-Deconvoluter. A dialog box might pop up before the TMA-Deconvoluter
opens, asking you if you want to enable macros (as shown below).
Click "Enable Macros". If you leave them disabled, the TMA-Deconvoluter
will not run.
Enable Macros
After opening the
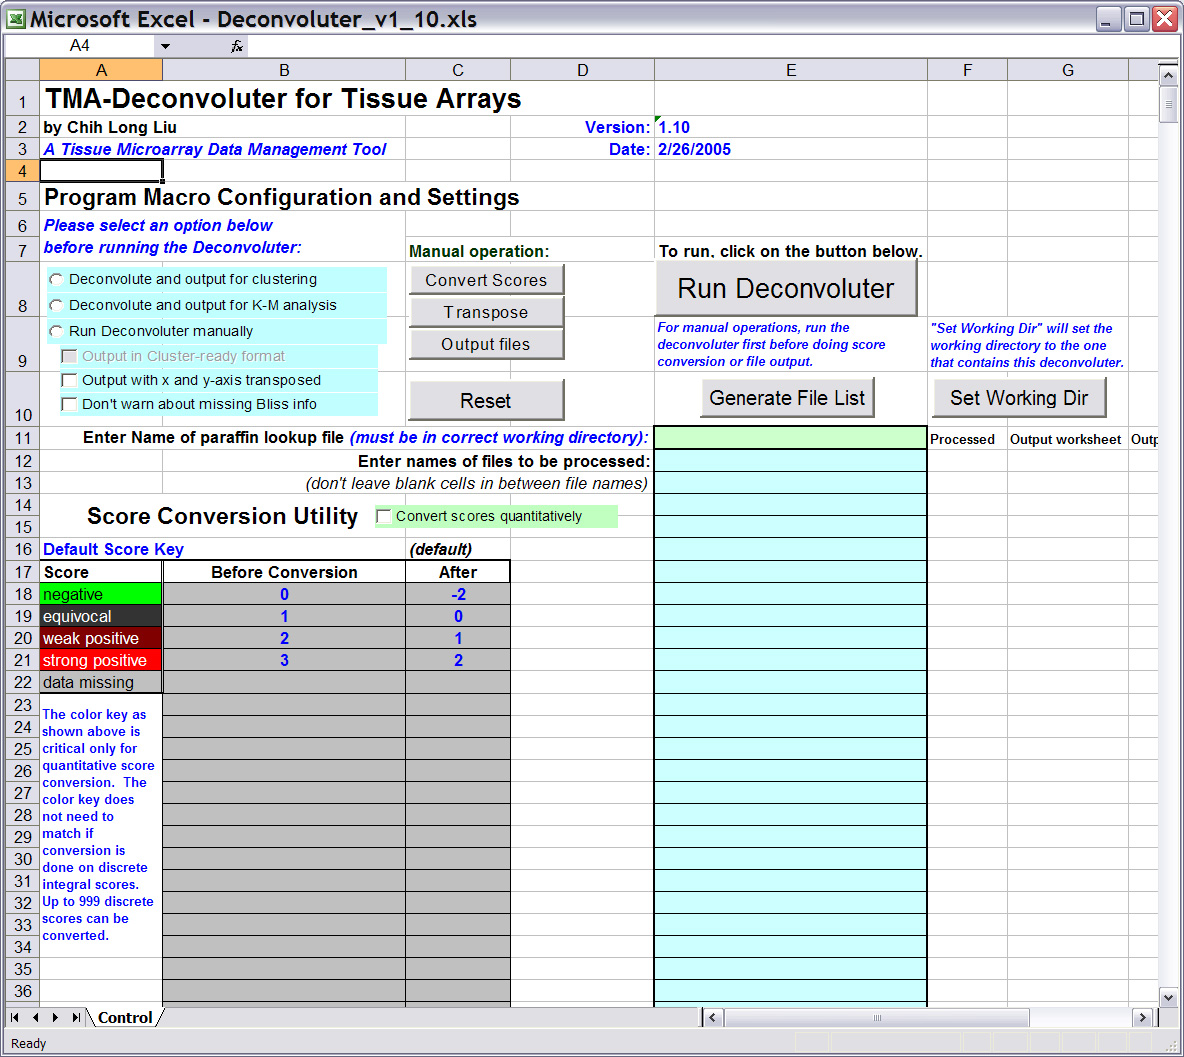
TMA-Deconvoluter, you should be greeted with the screen below:
TMA-Deconvoluter 1.10 Screenshot
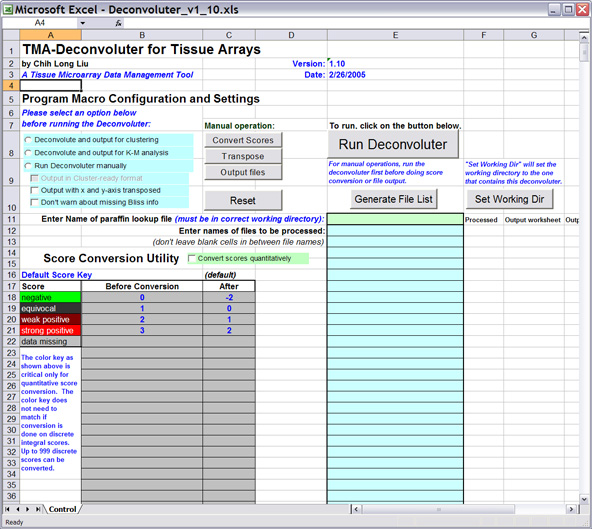
Click on the image for a larger view of the picture.
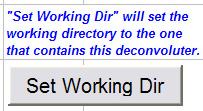
Excel normally sets the current working directory based on
your default settings, which may not necessarily be the directory
containing the TMA-Deconvoluter and the other files that you placed in
that folder. Click on "Set Working Directory" to set the
working directory to be the container for your TMA files.
Set Working Directory
You now need to specify the name of the "paraffin" lookup file. Enter the full exact filename, including
the extension. (The version available for download comes prepared for operation with
the demo files.)
Enter Filenames

Specify the names of your raw scoring workbooks. The
TMA-Deconvoluter is capable of batch operation, so you can process
multiple files at a time. A helpful feature is file list generation,
where instead of having to type in all the file names of the list of
files you wish to process, you can graphically select the desired
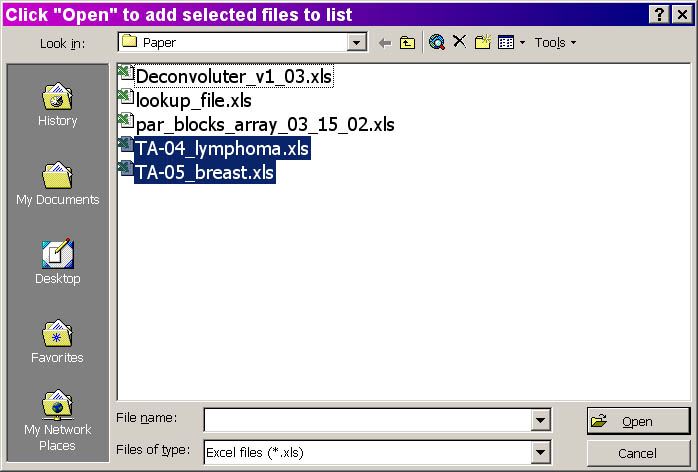
files in your folder. To do this, click on "Generate filelist".
An Open file dialog box will appear below:
Open dialog box
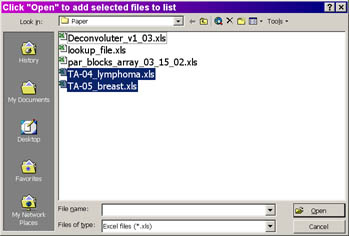
Click on the image for a larger view of the picture.
Select files by clicking and dragging. To select multiple
files that are not listed next to each other, hold down the Ctrl key
while selecting the desired files, either with the mouse or by using
the arrow keys and the spacebar. Click "Open" to add those
files to your list.
Optional: You may specify the names of the output files,
which will be in text tab-delimited format. Specify the names of the
output files (without the .txt extension) in the appropriate
cells (see below).
Output Filenames

The next step of the walkthrough will further describe the
"Processed" and "Output worksheet" cells.
Option Selection
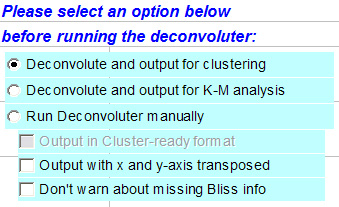
Choose an output option. For clustering, the default is
shown above. The next step in this walkthrough will also show what
the output will look like if you had chosen the K-M output option.
Score Conversion
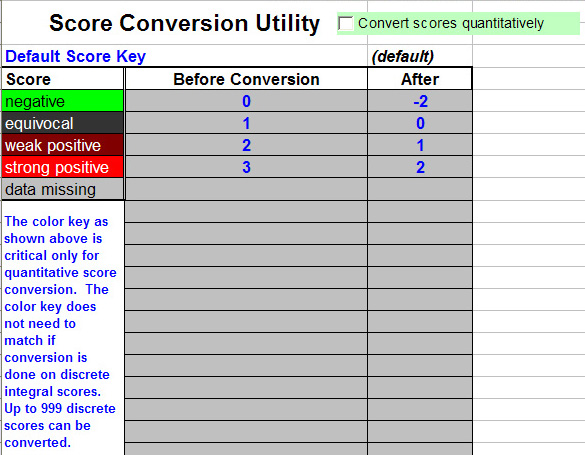
In order for TMA data to be visualized correctly under TreeView, scores
need to be converted from the user's scoring system to a system compatible with
TreeView. The user's scoring system can consist of discrete integers, such as that
shown in the default Score Key shown above.
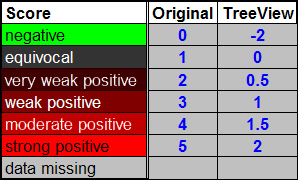
Version 1.07 and higher supports
conversion of up to 999 discrete, user-defined scores. An example of a scoring
system with more than 4 scores is shown below:
Note: the color key shown in the first column above is only
shown as a guideline. It isn't necessary to indicate the above color
key as depicted above; specifying the numbers will be enough, and
furthermore, it won't be necessary to match your scoring system to the
color key above.
Since Version 1.10, the TMA-Deconvoluter can also handle scoring systems that
consist of a continuous range of scores, which can be integers or floating point
decimals. In order for the TMA-Deconvoluter to convert such scores correctly, check the option below:

You will notice that the Score Key will change to appear as follows below:
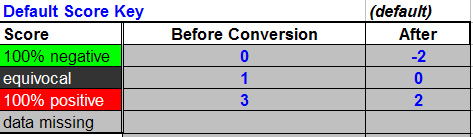
Enter the minimum (usually 100% negative stain) and maximum (usually 100% positive stain) possible values for
your scoring system under "Before Conversion". Also, enter the value your scoring uses to denote equivocal/uninterpretable stains. This
needs to be a single value - it cannot encompass a range. Scores will be converted, by default, to a range of
-2 to 2, centered at 0 (for equivocal/uninterpretable scores). You can adjust this range (listed under "After"),
so long as the absolute value of the minimum and maximum converted values are equal to each other. For a more
detailed discussion on how this conversion process is performed, click
here.
Score conversion can be carried out separately under manual
operation, but you will need to select the "Run Deconvoluter manually"
option and Run Deconvoluter first before converting the scores.
Run the Deconvoluter
You are now ready to run the Deconvoluter. Click on the
button as shown above.
back to top
Step 2 - the output files
Return to the walkthrough
overview page.
|