|
What you will need for this walkthrough:
Note: if this is your first time using the TMA-Combiner, it
is recommended that you proceed to the
Downloads section of
the TMA-Combiner website and download the Demo Suite files.
The examples presented in this walkthrough employ those files, and
you should obtain the same results in using these files and with the
other necessary programs available elsewhere.
- Deconvoluted text tab-delimited files containing your TMA data
- The TMA-Combiner
- The Cluster program
- The TreeView program
- Microsoft Excel for Windows with Visual Basic support installed
- A Windows PC
Begin by storing a copy of the TMA-Combiner, and your deconvoluted
TMA files in the same folder. (If you
decide to put the files elsewhere, you will need to know how to
specify the appropriate path information in the entry fields for those
files).
Note that Office XP, 2003, and later usually defaults the security level
to "high". In that situation, you may get this dialog box:

To fix this, go to the Tools menu, select Macros, and then select Security, as shown below.
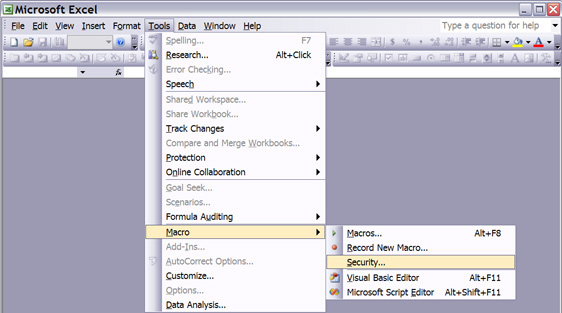
You will get this dialog box:
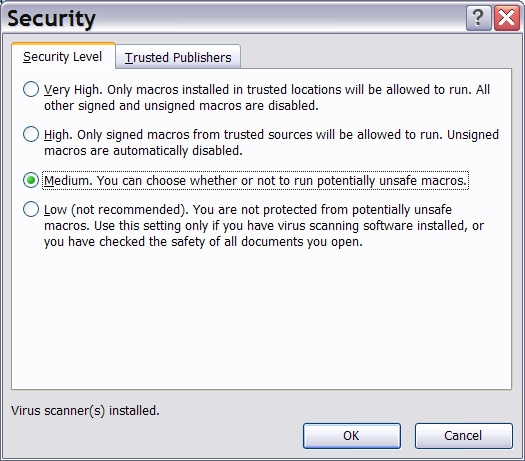
Please ensure that "Medium" is selected. If you have "High" or "Very High"
selected, the TMA-Combiner will not run. Once you've clicked "OK", you may
now open the TMA-Combiner. A dialog box might pop up before the TMA-Combiner
opens, asking you if you want to enable macros (as shown below).
Click "Enable Macros". If you leave them disabled, the TMA-Combiner
will not run.
Enable Macros

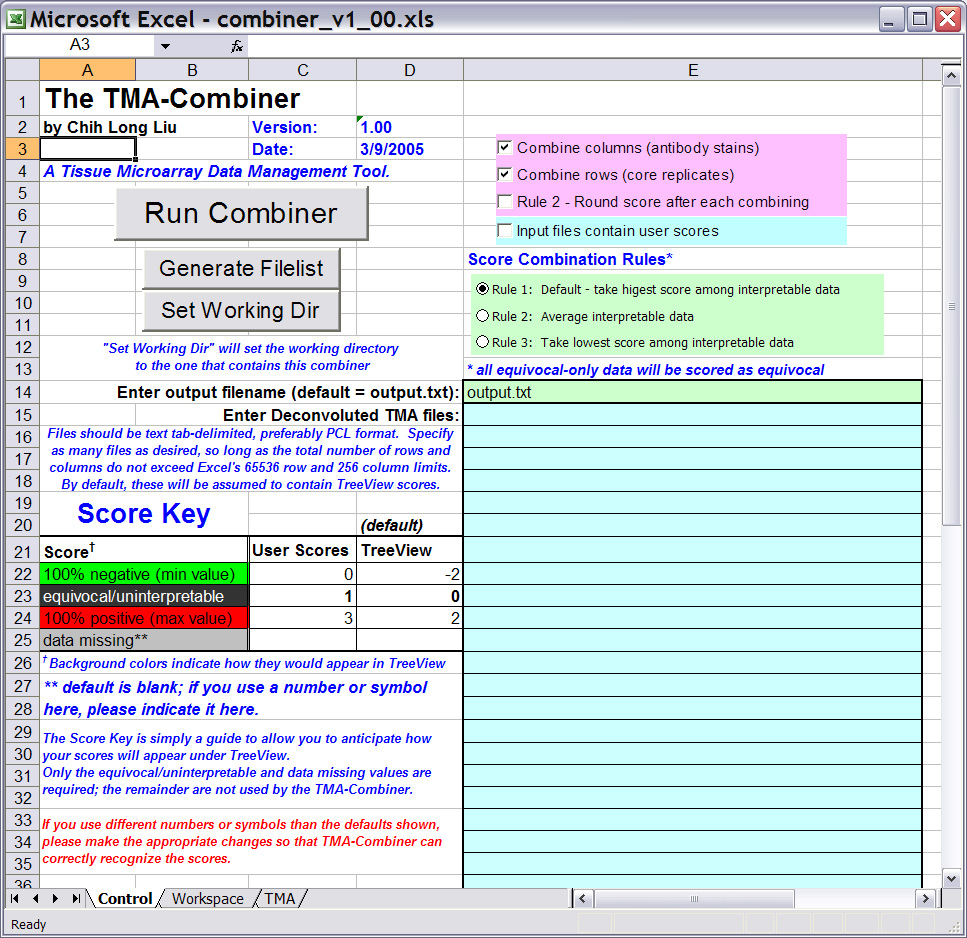
After opening the TMA-Combiner, you should be greeted with the screen below:
TMA-Combiner 1.00 Screenshot
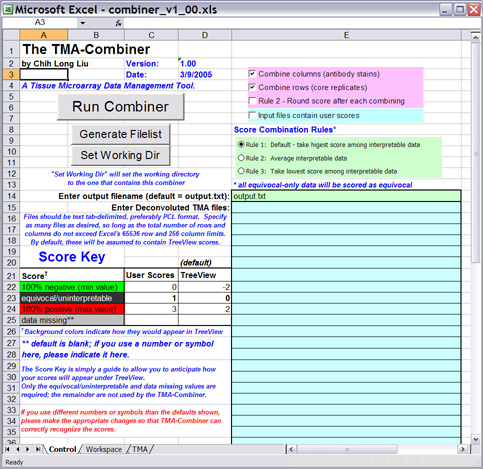
Click on the image for a larger view of the picture.
Excel normally sets the current working directory based on your default settings,
which may not necessarily be the directory containing the TMA-Combiner and
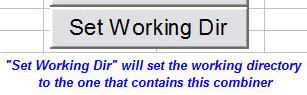
the other files that you placed in that folder. Click on
"Set Working Dir" to set the working directory to be the
container for your TMA files. You may see a dialog box
indicating the current working directory and the new working
directory, and it will request whether this is correct.
Click "Yes" or "No" to continue.
Set Working Directory
Enter Filenames

Specify the names of your deconvoluted, PCL-format text tab-delimited
files in the light blue worksheet cells. As mentioned above, you can specify as many files
as you want, so long as the total number of rows and columns do not exceed Excel's 65536 row and
256 column limits. If you have more files than the number of light blue worksheet cells available,
then that is fine; all files will be processed even if they are not in a light blue worksheet cell, so
long as the file list is contiguous (i.e. no gaps) from the very first cell located next to
"Enter Deconvoluted TMA files" as shown above.
Note: ALL files you specify will be combined into a SINGLE output file. If
you actually wanted to combine your TMAs into more than one separate combined dataset, you will need
to process each combined dataset separately. Furthermore, if portions of your TMA dataset to be
combined need different score combination rules applied, you should combine those portions separately
with the appropriate rule before combining the combined files together. Only then can you assemble the
entire dataset with the TMA-Combiner (at which point you can select
any rule; it won't make a difference, at this stage, in the final combined result).
You may either type the file names in manually, or
alternatively, particularly if you are going to process multiple files,
you can click on "Generate Filelist". This allows you to graphically
select the desired files in your folder, instead of having to type in
all the file names of the list of files you wish to process. An Open file
dialog box will appear below:
Open dialog box
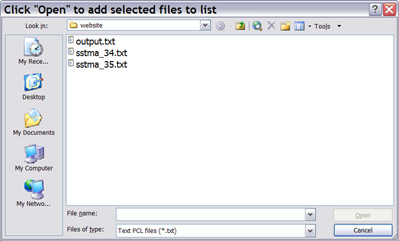
Click on the image for a larger view of the picture.
Select files by clicking and dragging. To select multiple
files that are not listed next to each other, hold down the Ctrl key
while selecting the desired files, either with the mouse or by using
the arrow keys and the spacebar. Click "Open" to add those
files to your list.
back to top
Step 2 - Score Combination Rules, Part 1
Return to the walkthrough
overview page.
|